Installation Guide
System requirements
Click here to view the system requirements to run the Thermoflow software suite.
Summary
(1) Create an account on the Thermoflow Service Center.
(2) Login to the Service Center and download the New Version Manager.
(3) Install and run the New Version Manager. Follow its prompts to return to the Service Center to download the latest Version.
(4) Install and run the latest Version. Register your installation as prompted when you first start your licensed Thermoflow program(s).
Where is the Thermoflow Service Center?
Thermoflow's Service Center is online at https://www.thermoflow.com/ServiceCenter.
How to Create a User Account
Before you can use the Service Center you need an account. You do this from the New User link on the Service Center.
What do I need to create an account?
To create an account you need to know the Site ID number Thermoflow assigned to your site. If you don't remember your Site ID number, click here for help. You also need a valid email address on your corporate email system. The Service Center will send emails to that account so you need to be able to access that email to finalize your account.
New User Registration
Enter the information requested on the form shown below.
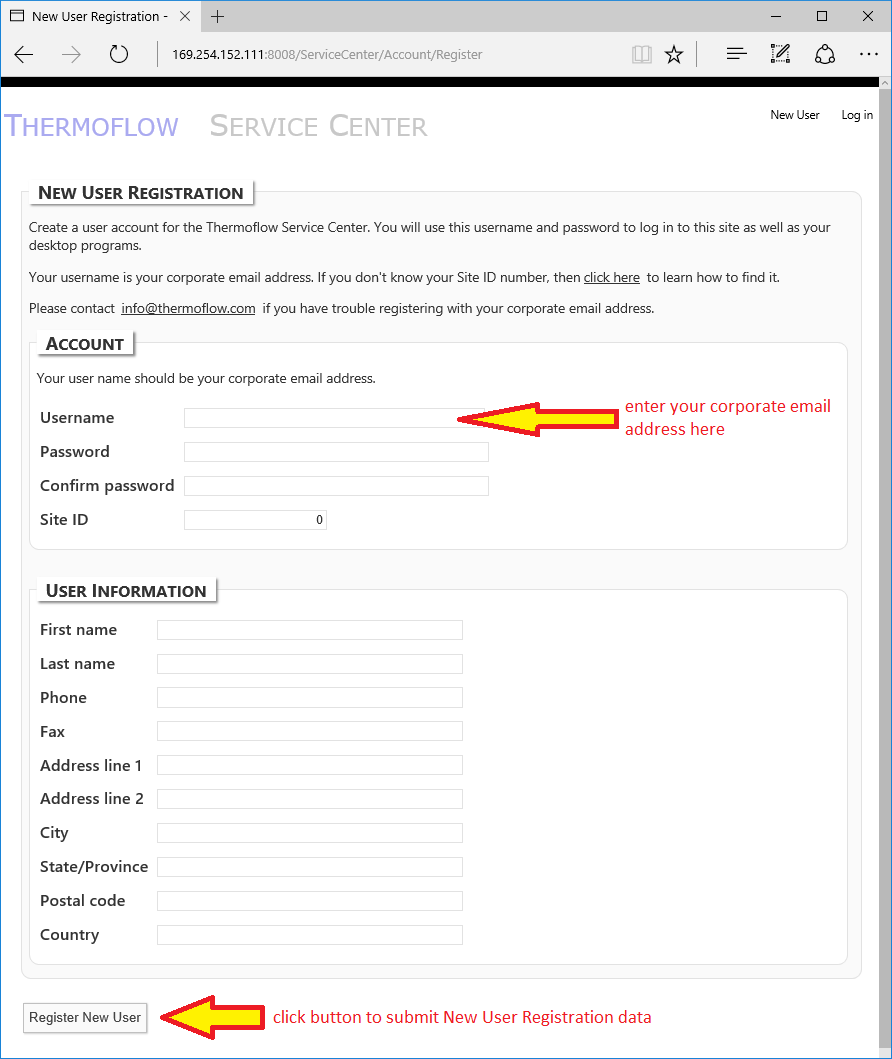
Account
The account information is used to login to the Service Center and also to start the desktop software.
Username
Use your corporate email address for your username. Only addresses on valid, pre-defined, corporate domains are acceptable. The Service Center will communicate with you using this email address, so you'll need to be able to receive email using this account to complete this process and ultimately use the Service Center.
Password
The password field is yours to specify. Passwords must be at least eight characters long. You will use this password for both Service Center access and also to start the software, GT PRO, STEAM PRO, THERMOFLEX, etc.
Site ID
The Site ID is assigned to your site by Thermoflow. If you don't know your Site ID you can easily find it as described here
User Information
The user account information you enter here will be used by Thermoflow solely for its business with you, the user. This information will not be sold or disclosed to any unrelated party.
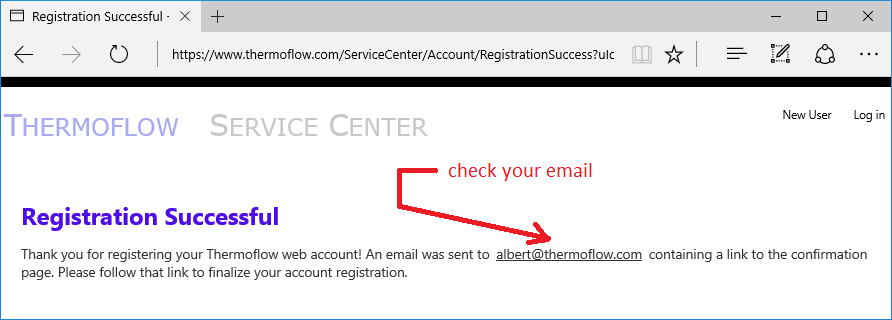
Registration Successful
The following page is shown upon successful completion of the New User Registration process. The Service Center will immediately send an email to the address you specified. The email will come from info@thermoflow.com, so check your spam folder if you don't receive an email in a timely fashion.
Welcome Email
The email you receive includes a link back to the Service Center as shown below.
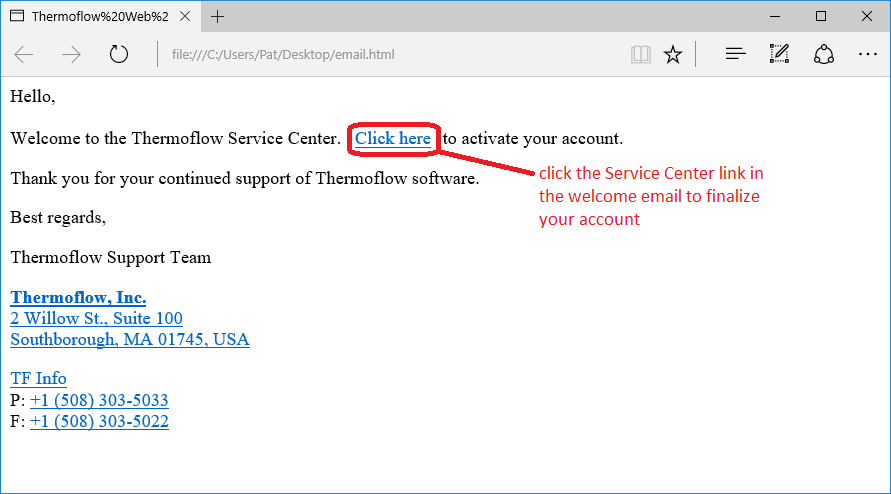
Click that link to activate your account. The following page confirms you've successfully created a Service Center account.

Service Center Login - Download New Version Manager
Now that you have a Service Center account, you login using your corporate email address and the password you chose during registration. Upon login, the Service Center displays the Download card for the New Version Manager as shown here. Click the Download link to download the New Version Manager installation program to your computer.
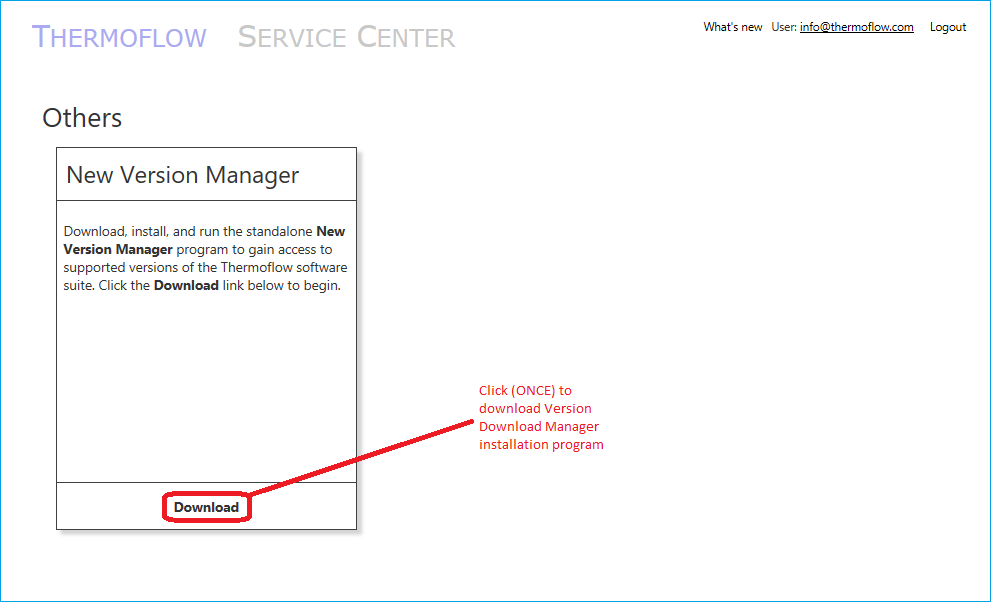
Afterwards, run this file to install the New Version Manager on your computer. You must be logged onto the computer as "Administrator" or as a user automatically treated as an administrator for SETUP programs.
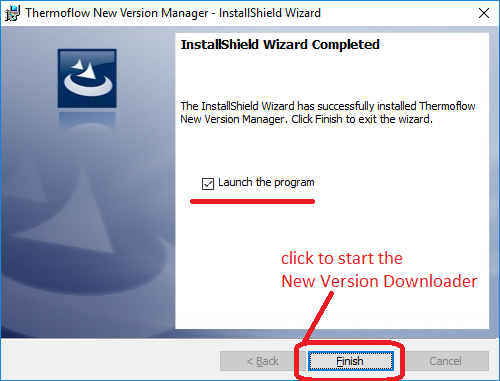
At the end of the installation, the program should start automatically. If not, open the Windows Start menu and navigate to "All Programs (All Apps) > Thermoflow > Version Download Manager". Be sure to attach your hardware key because the New Version Manager looks for it at startup.
Note: If after running the New Version Manager an error message stating "Sentinel key not found" pops up, the device driver used by our hardware key must be installed manually. To do this, run the utility "HASPUserSetup.exe", which will be found in the Start menu under "All Programs (All Apps) > Thermoflow". After completing the driver installation, run the New Version Manager again and it will launch successfully.
Run New Version Manager
The New Version Manager looks for any valid Thermoflow key. If one is found, you'll see the following screen. It gives you two ways to connect to the Service Center: (a) directly using this computer when it's online, and (b) indirectly using another computer to connect to the Internet.
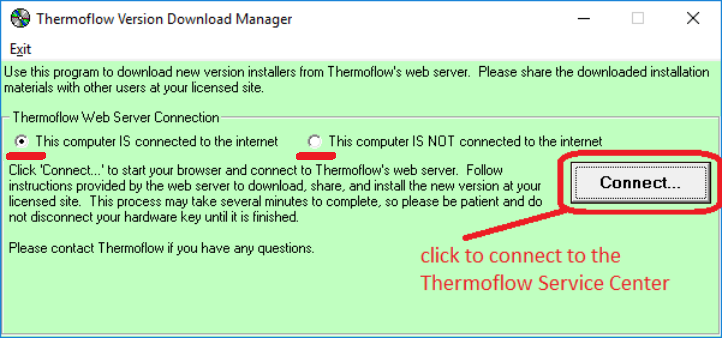
If you don't have your key attached, or if the device driver is not installed, you won't see the screen above. Instead you'll see a message indicating the program cannot find the Thermoflow hardware key. Usually this is resolved by attaching the key, or by installing the HASP device driver used by the key.
Download New Version Installation Materials
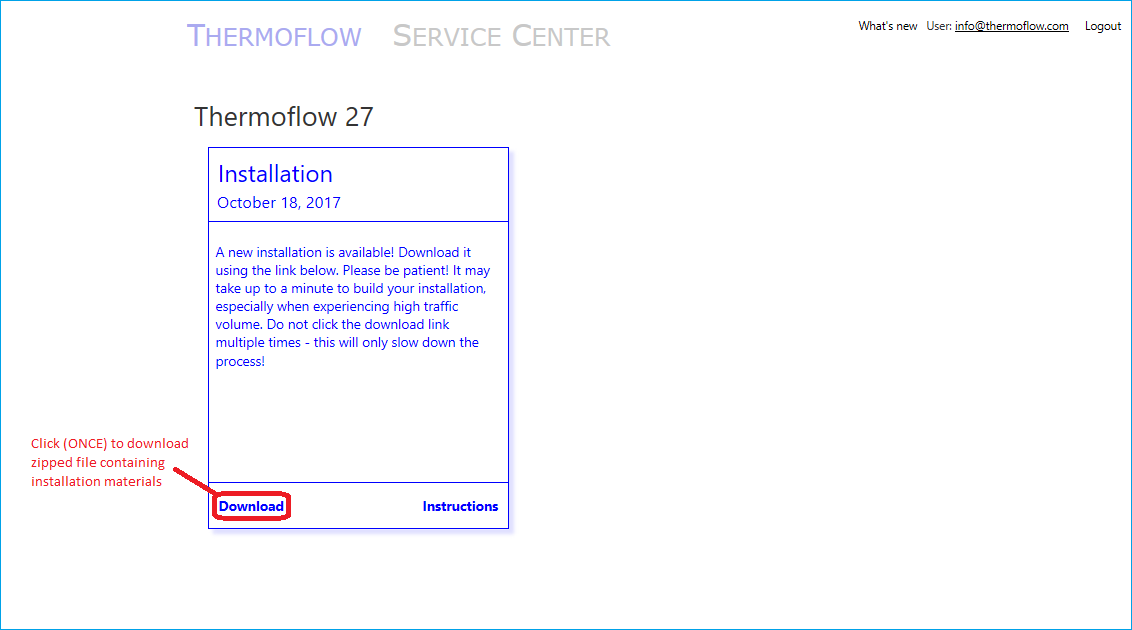
Now that you've returned to the Service Center using the New Version Manager you have full access to all content the Service Center has to offer for your site. The dashboard shows what you came for near the top, and other information you may find useful below that. In this case you are visiting the Service Center to retrieve the the latest Version installation, so that's shown first. Click the Download button to download the installer to your computer.
Install Latest Version
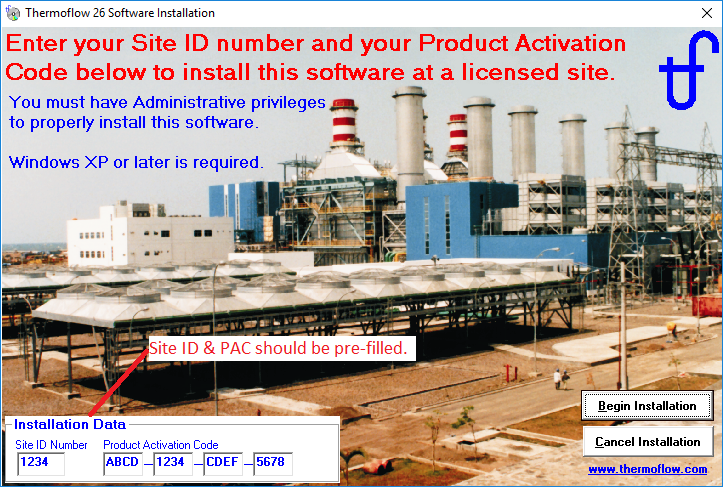
Unzip the installation materials from the zipped file downloaded in the step above. Afterwards, run TFSETUP.exe from the unzipped folder to start the standard Thermoflow installation process. Your Site ID and PAC number should be automatically filled in for you.
Note: If you run TFSETUP.exe from the zipped file, your Site ID and PAC number will not be automatically filled in. If your Site ID and PAC number are not automatically filled in, click Cancel Installation then run TFSETUP.exe from the unzipped folder.
Finish by Applying Updates and Registering Installation
After installing, when you first start a licensed Thermoflow program, you will be prompted to select a 'Personal Files' folder. Then you will be prompted to register the installation, with a dialog box asking you to visit the Service Center, where a Registration File can be acquired. Click "This computer is: ON-LINE", and you will connect and login to the Service Center again. Within the Service Center, download a) the Revision, and b) the Registration File (which will be a file titled "TFxx00.txt, with xx being the Version number).
First, run the downloaded Revision to ensure you have the latest software features and functions applied. Then, start a licensed program again. At this point, the Registration File you downloaded may be automatically detected and processed. If it isn't, you will be prompted to seek the file. In this case, click the “Click to Browse” button, navigate to where the registration file was downloaded, and open it to process it. Once the Revision has been applied and the Registration File has been processed, your software installation will be complete.